Showing posts with label DIY. Show all posts

Saturday, March 1, 2014

Saving Chocolate Mission

Today the little brother just got back from a short getaway to Malacca. And he brought back tonnes of food, especially the Nadeje crepe cake that I requested. I expected him to buy only 2-3 slices but he bought 10 slices. I'm so gonna put on a few pounds before my Bali getaway. Oh boy...

Among the food that he bought, there's kuih dodol, cempedak slices, cookies, 2 boxes of chocolate and another pack of melted alien look-alike "chocolate".


I don't know whether to laugh or cry when I looked at this because it's so funny how he can bring it back without realizing its current state yet it's pretty disgusting. LOL.


When you see this, what would you do? 
1. Keep it in the fridge and then struggle to eat it?
OR
2. Feel disgusted by it and throw away with heavy regrets?


Hmm..
I've decided to keep it but not in its current state of course. I wouldn't have the appetite to even take a bite with this look. So, DIY chocolate saving mission!


Step 1: Squash everything to get all mixed up.
The chocolate was supposed to be covered with dark chocolate powder and has an almond nut inside each one. I squashed everything inside the whole packet to get an even mix.


Step 2: Cut an opening at the edge of the plastic bag to pour the chocolate out. 
 You can have any container for this but remember, chocolate hardens. If the container is too big, you might have a problem eating it later. So, I opt for ice cube container!
 Make sure the opening is not too small so that you can get the nuts out with the chocolate and not too big as you don't want to end up with too much chocolate pouring out at once.


Shake the container gently till the surface is flat or you can just leave it that way to get some pattern.


TADAA!


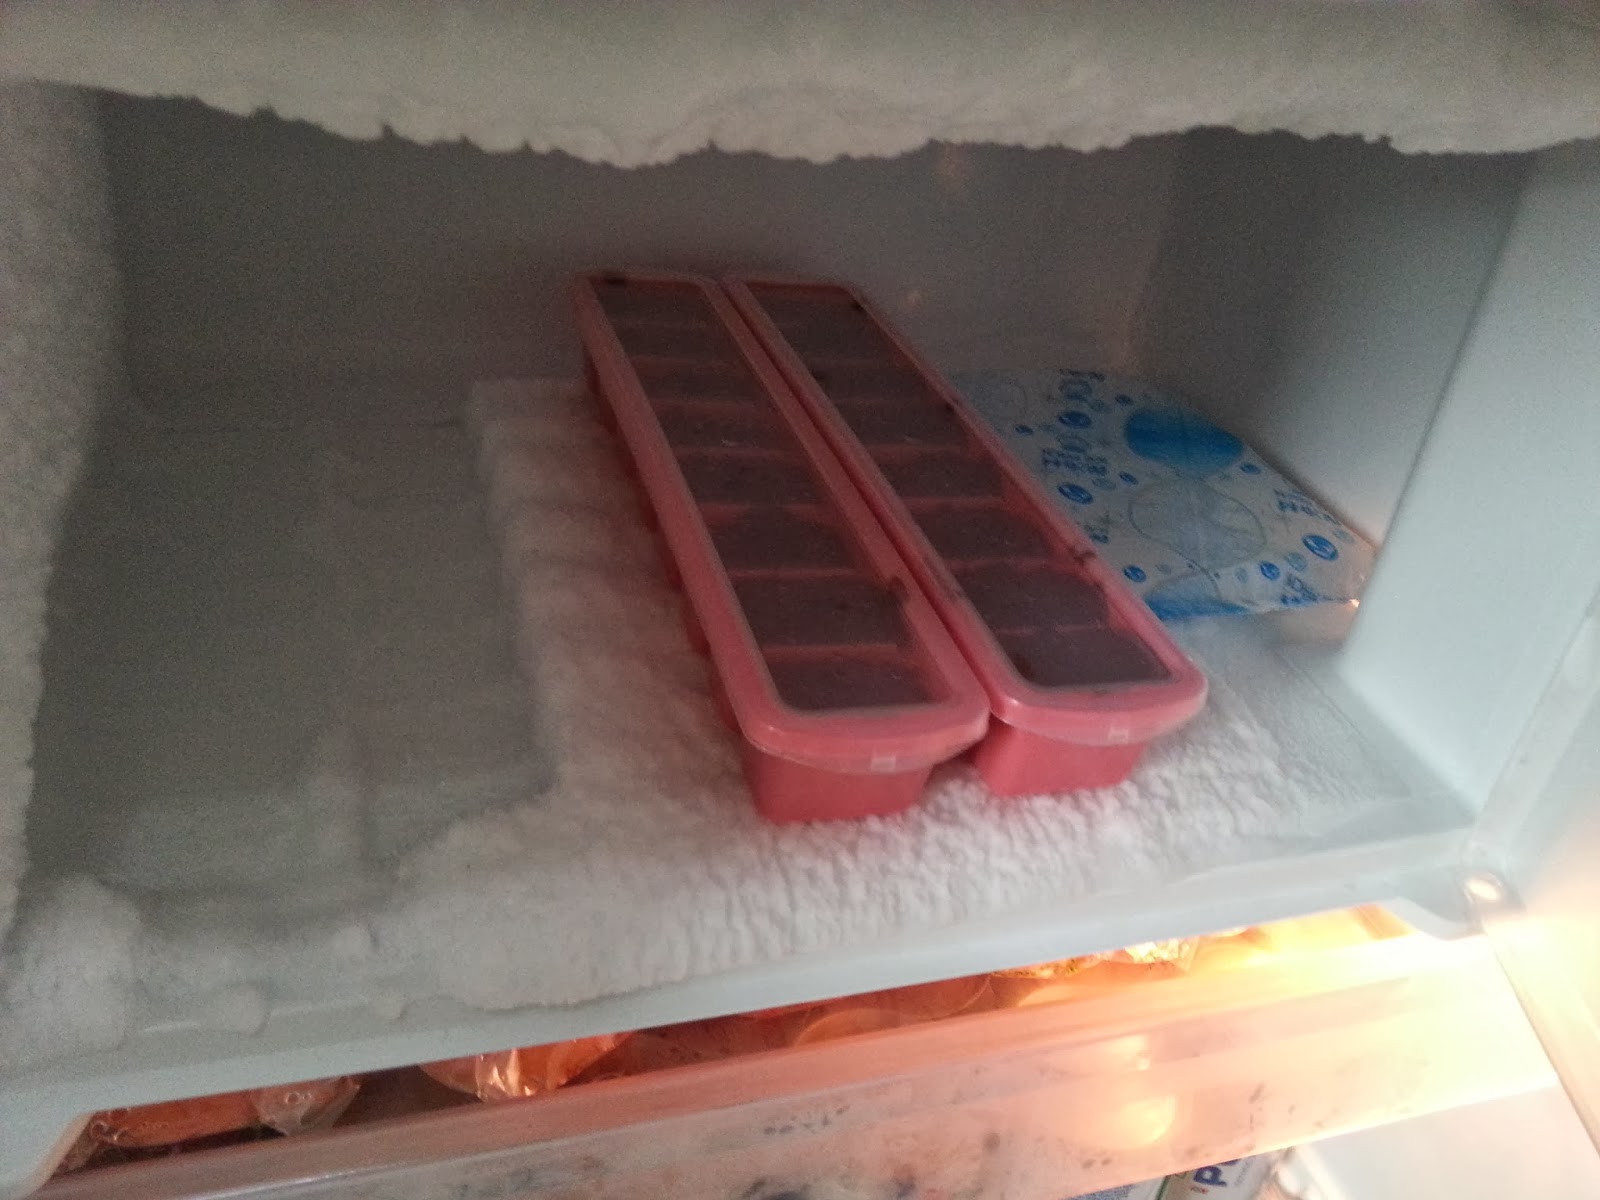
Step 3: Put your covers on and set them in the freezer for a bit.
Say.. Maybe 15 minutes?
.
.
.
.
.
.
.
.
.
.
.
.
.
.
.
.
.
.

And this is how your end product will look like (:


Arrange them nicely and you are good to feast on them..
And wahlaaaa, bon appétit!


Hope you enjoy this post! 


Much loves, xoxo.


Monday, November 4, 2013

Manicure: Cheap yet Fast?


Having a function at night after work and there's no time to get a manicure?
Check this out, nail art stickers that can be put on in 5 minutes and you're ready to go!


Found this while wandering around GM Klang with my babe. Some of the designs caught my attention 
and in my mind was.. "If it's easy to apply on, why not? Maybe can use for CNY, one day one design to suit my OOTDs". And it only cost RM5 anyhow. 

So, I bought one home after half an hour ransacking through the gazillion pieces to find one which I fancy.
Finally decided on this because
1. It's versatile
2. You can never go wrong with black and white
3. I can hypnotize people with the pattern :p


The back of the packaging with instructions (:


As you can see, there's 12 pieces altogether, 6 for each hand.


Step 1: I first cut out one piece so it'll be easier for me to apply on.
(Can skip this step as it turned out to be unnecessary)

Step 2: Remove the upper transparent layer.

Step 3: Remove the nail art sticker. (It feels like normal sticker)

Step 4: Stick the nail art sticker onto your nail.
(It'll definitely be bigger than your nail unless you have very big fingernails)

Step 5: Instead of filing the sides, I used a scissors to slowly trim.


And my end product?

.

.

.

.

.

.

.

.

.

.

.

.

.

.

.

.

.


I've painted my fore and ring fingers black instead of sticking the sticker on all nails.
Super happy with the overall design 


*TIP: Do not do this before your shower as the sides might "pop up" and it'll ruin the whole thing.
They're just stickers after all.


~.~.~.~.~.~.~.~.~.~.~.~.~.~~.~.~


Hope this serves as an useful tip for all you busy bees out there
(:


Was thinking of doing a giveaway for this, what are your thoughts? Do leave a comment ^^


Much loves, xoxo.

Saturday, October 26, 2013

Glam Them Up ❤

Being a shopaholic, I can't resist bargains. It's not an excuse, more like it's in my genes! :D 
(an excuse to cover up excuses)


These are in my October's hauls. Will post that up soon, was waiting till end of the month (:

So... They do looked a tad plain right? Don't get me wrong, I do love plain stuffs too, just that at times, 
I love to be my own glam guru and DIY my stuffs.

The product chosen for this post, one of the sandals!

What do you need?
1. Super strong glue and tweezers
You can get the glue from hardware stores. Just tell them you want the liquid type of "elephant glue". 
It only cost me RM2.


2. Any jewelries or accessories as your glam tools.
For me, I have my secret stash (:


3. Your pair of sandals or shoes, of course.
I've chosen the pink one.

Step 1: Play around with the beads, select your colors and shapes.
Step 2: Try them on the shoes and choose the ones which suit best.
Step 3: Place them in various ways and patterns till you are satisfied.
OR
You can start sticking them on randomly and go with the flow of your creativity

Randomly placing the beads

Step 4: Use the tweezers to grab the beads to stick them on.
(This is to avoid the beads from sticking to your fingers if the glue overflowed)


Follow all of the steps above and waaahlaaa!~ 
You have your own version of glammed up sandals, one of a kind created by yours truly (:


"It’s a new era in fashion - there are no rules. It’s all about the individual and personal style, wearing high-end, low-end, classic labels, and up-and-coming designers all together."
— Alexander McQueen


~.~.~.~.~.~.~.~.~.~.~.~.~.~.~.~.~.~.~.~.~.~.~.~.~.~.~.~.~.~.~.~.~.~.~.~.~.~.~.~.~
This is how it looks like on me ❤ What do you think?
Found this in my garden


I'll be sharing other DIY ideas from time to time, stay tune.
To end this post, let's get glam ❤


Much loves, xoxo.


Saturday, June 22, 2013

Do you love owls? (DIY Project)


I was wondering around Daiso the other day, looking for felt cotton for some DIY project. Sadly, realization hit me that they do not sell those anymore after I looked around the same area where they sell all those sewing related stuff twice. They only sell felt pieces now but in LOTS of colors! The colors are so cute that I just want to get all of them home.

You can get this for only RM5 (:


So, I bought a pack home and started to Google for inspiration! And I got my very own small owl pouch made of felt! Each and every stitch sealed with effort. 

My adorable little owl! 


And this is a short video on how you can DIY your very own owl pouch!
Good luck! (:


Hope you all enjoy the short video tutorial. Happy weekends! (:

Much loves, xoxo.

Hong Kong (Part 2): Dim Sum and Ocean Park

Oh boy, there goes my procrastination and half a year has passed since I made up my mind to comeback to the world of blogging. Many things ...